|
Eclectic Praise Wire Wrap Doll Iiadonnasanova Owens-Williamson demonstrates her process for making her Eclectic Praise wire wrap doll. 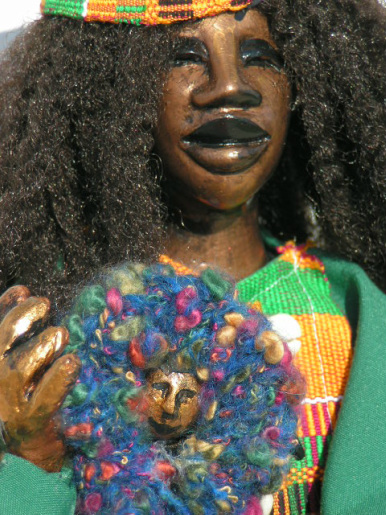 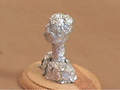  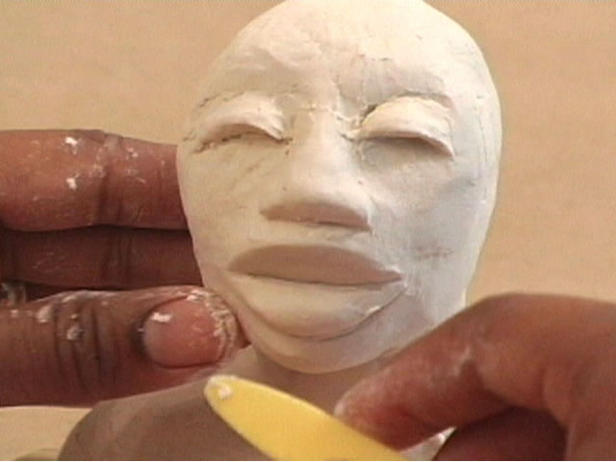 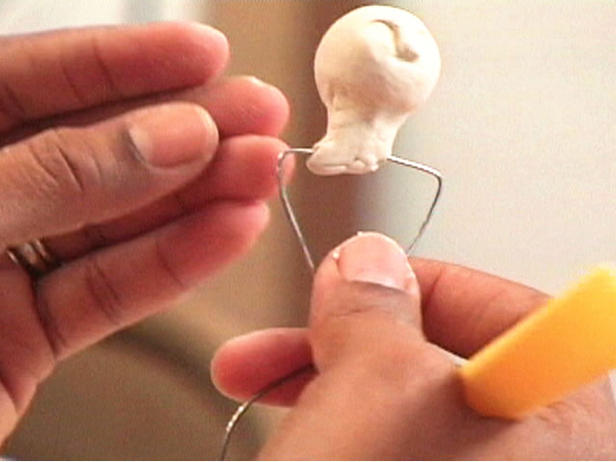 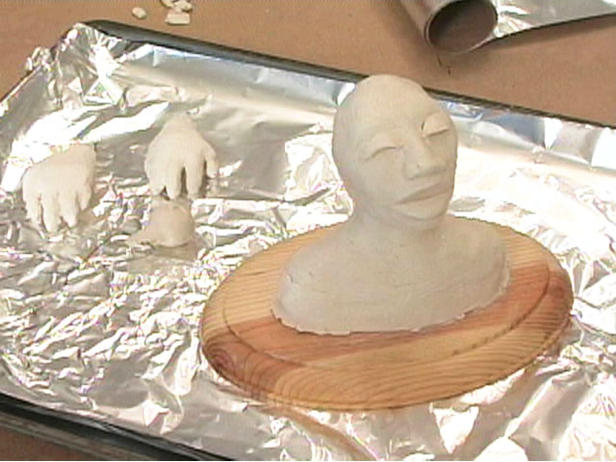 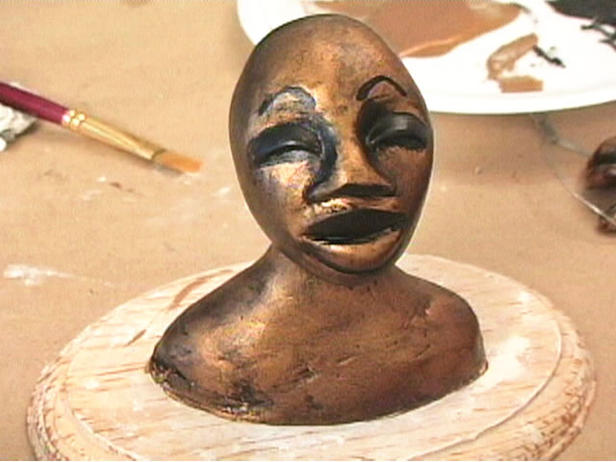     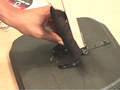 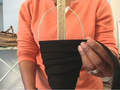 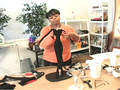   Materials and Tools:
16- to 18-gauge wire approx. 4-gauge thin wire for the hands air-dry paper clay fabric, synthetic hair, yarn watercolor paper for picture permanent black marker crochet needle beads aluminum foil 2 wooden bases (6 in. and 11 in.) acrylic paints gesso rotary tool bristle paintbrush watercolors artist brush hot glue gun and glue sticks any stretchy/elastic fabric for the body screwdriver/drill wood glue and wooden dowels 4" nail and hammer rolling pin clay tools cloth baking sheet masking tape needle-nose pliers scissors 2 L brackets screws sewing machine doll dress pattern Steps: 1. Hammer a 4-inch nail into the center of the small wood base. Build the shoulders and head around the nail with aluminum foil. 2. Roll paper clay into sheets with a rolling pin. Cover the aluminum foil with pieces of paper clay. 3. Smooth the clay using your fingers and clay smoothing tools. 4. Form a wire armature for the hands using 4-gauge wire. Cover the wire with paper clay and sculpt the hands. 5. Form a wire armature for the baby's head and body. Cover the baby's head area only with paper clay, smoothing the clay with your fingers. Sculpt the baby's face with clay tools. 6. Place the doll's headpiece, hands and the baby's head on a baking sheet in the oven for approximately two hours at 275 degrees. Remove and cool. 7. Apply a coat of gesso to all the clay pieces. Let dry. 8. Paint the doll's head and hands with copper acrylic paint. Let dry. Add accents to the doll's face and hands with black paint, wiping away the excess with a cloth. Let dry. 9. Separate the aluminum base from the doll's head. Cut the clay with a rotary tool from one side to the other. Remove the aluminum. 10. Glue the two halves of the head back together using hot glue. Let dry. Hot-glue synthetic hair onto the head. 11. Form a wire armature into the body. Tape the wire together at the waist with masking tape. Turn back the wire at the bottom of each leg one inch using needle-nose pliers. With the pliers, bend the feet at 90-degree angles to the legs. 12. Cut strips of fabric. Wrap the wire mummy style beginning at the feet. Hot-glue one strip of fabric to the bottom of a foot and wrap the fabric up the leg. Repeat with the other leg. 13. Build a doll stand by drilling holes in the large wood base and screw two L brackets to the base. Screw the other part of the L brackets to a wood dowel placed perpendicular to the wood base. 14. Attach the feet to the stand using hot glue so that the back of the doll rests against the wood dowel. 15. Wrap the remainder wire frame of the doll's body mummy style — wrapping the strips of fabric around the wooden dowel of the stand. 16. Form wire arms and attach them to the top of the wire doll armature. 17. Hot-glue the hands to the ends of the wire arms. Wrap the arms with more strips of fabric. 18. Hot-glue the doll's head onto the top of the wire armature. 19. Sew a dress as desired. An original designed dashiki was featured for our wire wrap doll's outfit. Add embellishments to the dress. 20. Crochet a baby blanket using yarn and a crochet hook. Wrap it around the baby. 21. Use a piece of fabric for the doll's hat and hot glue it to the head. 22. Bend the arms in front of the doll and glue the baby into the Eclectic Praise wire wrap doll's arms. Iia Owens-Williamson has been making dolls since she checked out a how-to book on wire armature dolls from the library when she was seven years old.
0 Comments
Leave a Reply. |
Webs and Blogs
Archives
October 2019
|

 RSS Feed